You want your walls to look like your battlestation actually belongs to you, but you’re not sure what to buy to get there without hiring an artist or committing to a mural you’ll regret in six months.
Disclosure: HobbyEngineered participates in the Amazon Associates program. Some links below are affiliate links, which means we may earn a commission if you buy through them, at no extra cost to you.
The “Useless Hobby” Was Never Useless
Every notebook from middle school through college has a back page like this: a border of geometric shapes bleeding into a stick figure battle, maybe a rocket ship, maybe a few pages in a row where the same little guy throws the same punch, frame by frame, because you were trying to make it move. Nobody taught you that. You just did it because sitting still with nothing to do was worse than getting yelled at for not paying attention.
That habit didn’t go away when school ended. It just changed jobs. It’s the wallpaper you picked for your phone. It’s the one piece of art in your battlestation photo that isn’t a monitor or a keyboard, the thing that actually signals whose desk this is instead of a template from a build guide. Freehand work reads as alive for the same reason graffiti does even when it’s rushed: nobody else can make that exact line, with that exact hesitation, twice. That’s not a skill claim. You don’t have to think of yourself as an artist for it to be true. It was never about being good at it. It was about making something yourself instead of consuming something someone else made.
Which is exactly why this still matters right now. A generation raised on typing a prompt and getting an image back has an actual reason to pick up a pen instead: the doodle is yours in a way the AI output never will be, no matter how much better it looks on paper. This is the pitch for going from notebook margins to an actual wall.
Where to Start: The Gear Ladder
You don’t need to buy your way into this. Most of what follows is cheap, and a lot of it you probably already own. Think of it as four tiers, each one a bigger canvas (sometimes literally) than the last.
Tier 1: Notebook and Pens
This is where it already lives if you’re doodling in class or in meetings. The upgrade from a random ballpoint is small but real.
A Dot Grid Sketchbook gives you structure without the childish look of ruled lines, useful if your doodles lean geometric. A plain Blank Sketchbook, Bristol Paper is the better pick if you’re doing the stick-figure-battle, flipbook-style stuff, since you’ll want smooth paper that doesn’t fight a fast pen line.
For pens, a Fineliner Pen Set replaces the ballpoint upgrade almost everyone eventually makes, since fineliners hold a consistent line width a regular pen can’t. If you want to bring color into the geometric-pattern side of doodling (the black-gray-white versus loud-orange-green contrast that works so well as a design principle), a Dual-Tip Color Marker Set covers both fine detail and fill without needing two separate kits.
Tier 2: Canvas, Brushes, and Frames
This is the moment a doodle stops being a doodle and starts being “real art” in most people’s heads, even though it’s the same instinct with more surface area. A Stretched Canvas Multi-Pack in a few sizes is the standard entry point. If you want a smaller, cheaper way to test a design before committing to canvas, a Canvas Panel Pack works the same way and costs less per square inch.
For paint, an Acrylic Paint Starter Set is the right call over oil for this kind of work: acrylic dries fast, cleans up with water, and doesn’t demand a ventilated studio the way oil does. Pair it with a Acrylic Paint Brush Set that includes a range of tip shapes, since doodle-style line work needs a fine round brush for outlines and a flat brush for fills, not just one all-purpose brush.
Once a piece is finished, a Floating Canvas Frame is what actually turns it into wall-ready decor instead of a canvas leaning against a shelf. This is the display step, and it matters more than people think. A framed piece signals intent in a way an unframed one doesn’t, the same way a doodle in a nice notebook reads differently than the same doodle on a napkin.
Quick pick: if you’re doing this for the first time and don’t want to overthink it, a canvas panel pack plus an acrylic starter set covers you for under the cost of a single framed print, and you can always upgrade to stretched canvas and frames once you know which of your designs are worth keeping around.
Choosing Your Medium
Not every surface behaves the same way, and picking wrong is the easiest way to get discouraged on your first attempt.
| Medium | Texture | Cost per piece | Best for |
|---|---|---|---|
| Canvas panel | Slight tooth, absorbs paint fast | Low | First attempts, testing a design |
| Stretched canvas | Bouncier surface, holds detail well | Medium | Finished pieces meant to be framed or hung as-is |
| Plywood panel | Smooth, rigid, takes tape cleanly | Medium | Wall-mounted panels, especially with masking tape technique |
| Thick cardstock / mixed media paper | Smooth, less forgiving of heavy paint | Low | Sketching a design before committing to a bigger surface |
A Birch Plywood Panel Pack deserves a specific mention here because it’s the one most doodle-to-wall-art posts skip. Plywood panels are effectively a removable wall: you can paint directly on them, mount them, and take them down if you move or if the space isn’t fully yours (a shared living room, for instance, versus a home office). If you’re not ready to commit to painting an actual wall, this is the middle step.
Going Digital: You Probably Already Own the Tool
Here’s the part that surprises people. If your doodling has already migrated to a screen (and for a lot of people it has, even if they don’t think of it that way), you don’t need to buy a dedicated drawing tablet to take it further.
An Android Tablet with Stylus or a standard iPad paired with a Capacitive Stylus Pen does the job for the vast majority of digital doodling. You don’t need a Pro model, and you don’t need a dedicated graphics tablet with a built-in screen. A Drawing App Subscription or a free app on either platform gives you layers, undo, and the ability to actually finish something instead of starting over every time a line goes wrong, which is the one advantage digital has over paper.
And here’s the part worth saying plainly: you won’t even need an expensive drawing tablet. A simple stylus and a Fire HDX Tablet can actually be your doodle pad. It’s an LCD screen, not e-ink, so touch and stylus drawing apps run on it the way they would on any budget Android tablet, and there’s a decent chance something in this family is already sitting in a drawer somewhere in your house. Even a Kindle Scribe, built for e-ink note-taking rather than color art, will let you sketch out a design before you ever touch paint, which is a strange but genuinely useful use for a device most people only use to read.
This is the generational pitch. You already own something capable of this. The question isn’t whether you can afford the tools, it’s whether you’re willing to open a drawing app instead of typing a prompt.
The Wall: Where This Actually Goes
This is the part that turns a hobby into home decor. The instinct to skip straight to “one big design across the whole wall” is understandable, but it’s also the fastest way to end up with something visually exhausting. A single large pattern covering eight feet of wall doesn’t give your eye anywhere to rest.
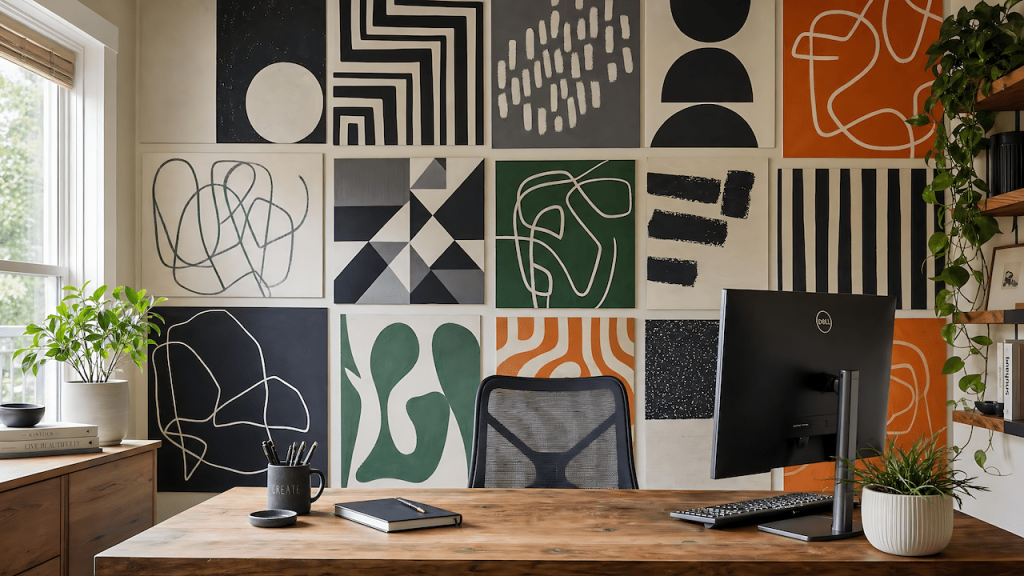
The better approach, and the one that actually mirrors how doodling works in the first place, is panels. Think of it less like a mural and more like a wall full of posters, or a sticker bomb on a laptop lid: each panel gets its own design, its own palette, sometimes its own mood. One panel can be black, gray, and white. The one next to it can be loud orange and green. You’re not trying to make them match, you’re trying to make each one work on its own, the same way you never doodled the same theme across ten consecutive notebook pages.
The technique for this is straightforward: paint a base coat, then use Painter’s Masking Tape to block out the shapes for each panel before filling them in. This gets you clean edges without needing a steady freehand line on the wall itself, which is a different skill than doodling on paper. A roughly 2×3 foot panel size is manageable for a single session and keeps each design from becoming its own multi-day project.
One rule worth following: this works best in a space that’s actually yours. An office, a workshop, a room nobody else has a say over. For shared spaces like a living room, stick to canvas or plywood panels you can hang and remove instead of painting directly on the wall.
From Pastime to Possible Income
Here’s the part that changes how you should think about all of this. People pay real money for custom pattern work, wall panel commissions, and personalized digital designs, precisely because a human made a specific decision on every line. That’s not a claim that everyone doing this becomes a professional artist. It’s a claim that the same “useless” instinct from your notebook margins has actual market value once you’re deliberate about it, and it’s worth more, not less, in a world where AI-generated art is free and everywhere. A hand-made design isn’t competing with AI on speed or polish. It’s competing on the fact that it can’t be regenerated by anyone else with the same prompt.
Paper to screen to canvas to wall. It’s the same habit growing up with you, one surface at a time.