Some links on this page are Amazon affiliate links. If you choose to buy through them, HobbyEngineered may earn a small commission at no extra cost to you.
These links only appear where tools or everyday support items naturally fit the topic. No sponsored placements. No hype.
Your electricity bill is not going to fix itself, and the solar installer quote sitting in your inbox is not the only path forward. A DIY home renewable energy setup is a systems problem, and like most systems problems, it rewards people who think through the foundation before they start buying components. Most people skip that step. They see their neighbor’s panels, get a quote, panic at the number, and either overpay for a professional install or buy a random kit online without understanding what they actually need.
This post is about doing it properly. Solar panels are the starting point, but wind turbines and rainwater collection can stack on top of that foundation in ways most guides ignore entirely. I’ll cover how to size each component based on your actual load, where the real DIY savings are, and where you still need to call a licensed electrician. I also built a free calculator specifically for this kind of planning, and I’ll show you how to use it before you spend anything.
What a DIY Home Renewable Energy Setup Actually Involves
A home renewable energy setup is not a single product. It is a system made of components that need to work together, and the decisions you make early determine whether the whole thing performs as expected or underdelivers because something in the chain was sized wrong.
The core components of a grid-tied solar setup are panels, an inverter, mounting hardware, DC wiring, and the AC connection to your distribution panel. The panels generate DC power. The inverter converts that to AC and either feeds your home loads or exports excess to the grid. That export, handled through net metering, is what lets a grid-tied system offset nighttime consumption even without batteries. You generate during the day, bank credits with your utility, draw against those credits at night.
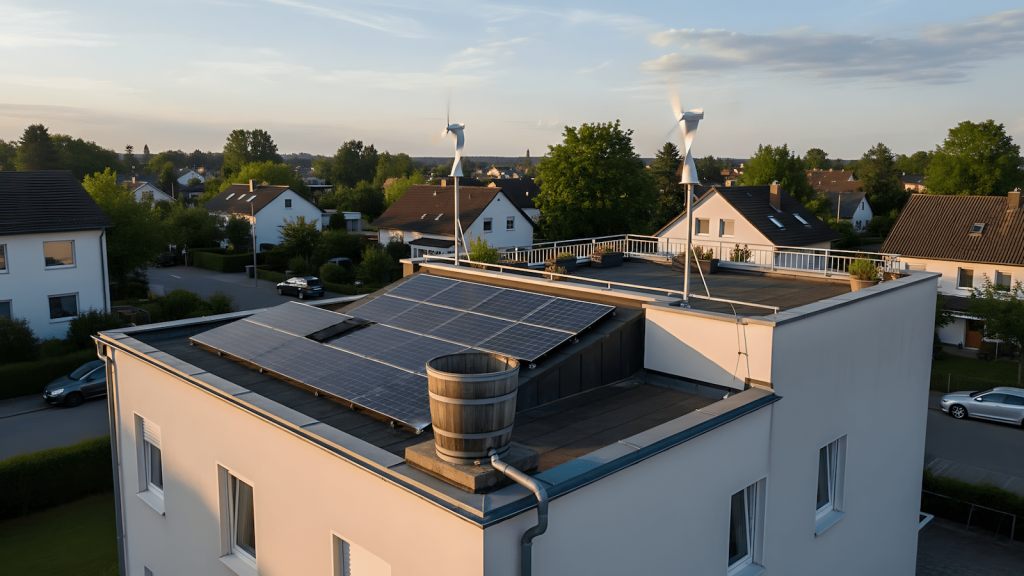
Wind turbines add a separate generation source that works independent of sunlight. A vertical axis wind turbine, or VAWT, is the right choice for residential and urban settings because it catches wind from any direction, runs quieter than horizontal axis designs, and does not need to be mounted high on an open pole to function. They are not a replacement for solar but a complement, particularly on overcast days when panel output drops. Rainwater collection sits in a separate category entirely. It does not generate electricity on its own, but a pipe turbine attached to a downspout can generate modest power during rain events, and the water storage side of the system has its own cost savings independent of your energy bill.
The most important decision upfront is grid-tied versus off-grid. Grid-tied is almost always the right starting point because it eliminates the need for a battery bank, which is the single most expensive component in any home energy system. You stay connected to your utility as a backup, you register for net metering to bank excess generation, and you add batteries later when the budget allows. Off-grid requires sizing a battery bank large enough to cover overnight consumption every night, which adds significant cost and complexity before you have even proven the system works for your household.
How to Size Your Solar System Without Overbuying
The same mistake that drives bad PC upgrade decisions drives bad solar decisions. People start with the component they want rather than the load the system needs to support. A neighbor gets six panels and sees a 30% bill reduction, so the assumption is that more panels means more savings, linearly, forever. That is not how it works. Panel count without load analysis is the same logic as buying a 1000W PSU because bigger feels safer, and as I covered in why power supplies decide whether an upgrade is smart or stupid, that logic gets expensive fast.
Start with your monthly electricity bill. Divide that number by your utility’s rate per kilowatt-hour to get your monthly consumption in kWh. That number is your actual load, and it already accounts for everything running in your house including the late-night gaming sessions, the laptops, the aircons on timers, all of it. You do not need to itemize every appliance. Your bill already did that math for you.
From your monthly kWh figure, calculate your daily average. Then divide by the peak sun hours in your location, which typically runs between four and six hours depending on your region and season. That gives you the system size in kilowatts-peak you need to cover your daytime load. Add a 15 to 20 percent efficiency buffer for real-world losses from wiring, temperature, and inverter conversion, and you have your target system size. A 5 kWp system in a location with five peak sun hours generates roughly 21 kWh per day before losses, or about 18 kWh after the efficiency buffer. If your daily load is 15 to 18 kWh, that system covers your daytime consumption and generates modest net metering export.
The panels themselves are straightforward. Monocrystalline panels are the standard choice for residential installs because they have higher efficiency per square meter than polycrystalline, which matters when roof space is limited. Panel wattage has been climbing steadily, and 400W to 550W panels are now the normal range for residential. Higher wattage per panel means fewer panels for the same system size, which reduces mounting hardware and wiring complexity. The inverter is the more critical decision because it determines whether you can add batteries later without replacing the whole system. A hybrid inverter costs more upfront but accepts a battery bank on a dedicated port. A standard grid-tied inverter does not. Buying a hybrid inverter now and leaving the battery port empty is the right call if off-grid capability is anywhere in your future plans.
Wind Turbines: When They Add Value and When They Don’t
Wind turbines work well in specific conditions and generate disappointment in others. The honest assessment before buying any turbine is whether your location actually has consistent wind, not occasional gusts, but reliable average wind speed. A VAWT rated at 600W produces that output at its rated wind speed, typically around 12 meters per second. At 4 meters per second, which is a more realistic average for most suburban and urban locations, output drops to roughly 9% of rated capacity due to the cube law relationship between wind speed and power. Three 600W VAWTs at 4 m/s average produce about 160W combined, not 1,800W. That is still useful supplemental generation, but it is not a significant energy source unless your location has genuine consistent wind.
The case for small VAWTs in a residential setup is not peak output. It is diversification. On overcast days when solar panels drop to 20 to 30 percent of normal output, wind often picks up. The two sources complement each other in ways that matter when you are trying to maximize daytime generation. Small VAWTs in the 300W to 600W range are available from direct importers and online marketplaces at relatively low cost, which changes the math. If three 600W VAWTs cost the equivalent of one additional solar panel, and they generate meaningful supplemental power on days when panels underperform, that is a reasonable system addition. The MPPT charge controller required to connect them properly adds another cost line, but it is a necessary component for any wind integration and pairs well with a hybrid inverter setup.
What VAWTs do not do is replace panels. Anyone selling wind as a primary residential generation source in a suburban location without verified wind data is oversimplifying. Treat wind as a layer on top of a properly sized solar foundation, not as an alternative to it.
Rainwater and Micro-Hydro: The Third Source Nobody Talks About
Rainwater collection is infrastructure, not emergency prep. The go bag mindset applies here: you are removing friction before it becomes a problem, and you are building a system that works passively once it is installed. As I wrote in building a go bag for different scenarios, the best systems are the ones that work without requiring decisions in the moment. A rainwater collection system works exactly that way. Rain falls, water is captured, the tank fills, and the stored water is available for garden irrigation, toilet flushing, or laundry without touching your municipal water supply.
The basic setup is roof catchment through existing gutters, a first flush diverter to discard the initial dirty runoff, a storage tank sized to your intended use, and basic filtration if the water will contact anything beyond soil. A 100 square meter roof in a region that receives 300mm of rain per month captures roughly 24,000 liters during that month before efficiency losses. Even at 70% collection efficiency that is over 16,000 liters, which represents significant reduction in municipal water consumption for any household running a garden or growing operation.
Micro-hydro from roof runoff is a more niche addition but worth understanding for the right property. If your downspout has meaningful vertical drop before it reaches ground level, even 2 to 3 meters of head pressure creates enough flow to drive a small pipe turbine. A 200W turbine running at reduced efficiency due to limited head and flow will not power your house, but it generates real kilowatt-hours during rain events that would otherwise go to waste. The component cost is low, the installation is a modification to existing plumbing, and the math is favorable in any location with a proper rainy season. You are quite literally cutting your existing drainpipe, mounting a turbine inline, and collecting energy from water that was already flowing to the ground.
Run the Numbers Before You Buy Anything
The mistake most people make with renewable energy projects is committing to a component list before running the actual numbers. You see a deal on panels, you calculate what six panels would produce, you decide that sounds good, and you buy. Then the inverter arrives and it is undersized for the panel array. Or the panels produce more than your daytime load and you have no net metering agreement yet, so the excess generation is wasted. The plan should precede the purchase, every time.
I built PowerPlanner specifically for this. It is a free web app and installable PWA that lets you build a component stack from scratch, entering actual quantities, wattages, costs, and specs for every source in your system. Solar panels, wind turbines, micro-hydro, generators, battery banks, and rainwater collection all have their own input forms. You enter your monthly bill, your local utility rate, your peak sun hours and average wind speed, and the calculator runs the generation math, bill reduction estimate, system cost, payback period, and a year-by-year financial projection that accounts for annual rate increases. You can save multiple builds and compare a six-panel starter against a hybrid solar and wind setup before spending anything.
The tool works for any location. The math is the same whether your utility rate is per kWh in the Philippines, Australia, or the UK. You plug in your own numbers and the output reflects your actual situation, not a generic estimate built on assumptions that may not apply to your household.
What DIY Actually Saves You Versus Hiring an Installer
The labor and margin component of a professional solar installation is real and significant. Installers source the same panels and inverters available to anyone willing to spend time researching suppliers, and their markup on components plus installation labor can add 40 to 60 percent to the raw hardware cost. DIY recovers that margin directly. For a 5 kWp system, the difference between sourcing components yourself and paying an installer for a turnkey job can fund a significant portion of a future battery bank.
Where DIY makes genuine sense: panel procurement, mounting hardware fabrication and installation, DC wiring from panels to inverter, inverter placement, and VAWT installation. These are mechanical and low-voltage electrical tasks that a methodical person with basic tools can execute safely. Before mounting anything, verify your roof can handle the load. A standard residential panel weighs around 20kg, and a rack of ten adds 200kg or more to whatever structure is holding them. Using a multimeter throughout the process is non-negotiable for verifying connections before energizing anything, and if you are new to electrical testing, how to use a multimeter covers everything you need to know before touching your first solar circuit.
Where you still need a licensed electrician: the AC side from the inverter output to your distribution panel, and the net metering application with your utility. Most utilities require a licensed electrical work permit for grid interconnection, and the application process for net metering involves inspections that will fail without properly documented AC work. The electrician cost for that specific scope is a fraction of what a full turnkey installer charges, and it keeps your DIY work legal and grid-compliant.
Before any work starts, check your local building department for permit requirements. In many areas, grid-tied solar installations require both a building permit and an electrical permit, and wind turbines may also trigger zoning, height, and setback rules depending on your municipality. The permit process is not a reason to avoid DIY, it’s part of the process and a licensed electrician can usually help with the AC-side wiring and the documentation your local authority requires.
The Honest Ceiling of a Grid-Tied Setup Without Batteries
A grid-tied setup without batteries has a hard limit on what it can accomplish. It covers your daytime consumption and generates net metering credits that offset nighttime grid draw, but it cannot power your home during a grid outage. Most grid-tied inverters are designed to shut down during outages as a safety measure for utility linemen. If backup power during brownouts is a priority, a hybrid inverter with a battery bank is the only path.
The practical ceiling for bill reduction on a well-sized grid-tied system, assuming no battery storage, is roughly 70 to 80 percent depending on how much of your consumption happens during daylight hours. Households that run most of their load during the day, including home offices, computer setups, and daytime aircon use, hit the higher end of that range because solar generation is meeting load directly rather than relying on net metering credits. Households where most consumption happens in the evening see lower effective reduction because their daytime generation exports to the grid at the lower net metering credit rate rather than offsetting consumption at the full retail rate.
Batteries change that equation entirely by storing daytime excess for nighttime use. The cost of a properly sized LiFePO4 battery bank remains high, but the price trajectory has been consistently downward. The smart approach is to buy a hybrid inverter now, run the grid-tied system until the savings fund the battery investment, and add storage as a Phase 2 upgrade. The system architecture supports it from day one, and you have months of real generation data to right-size the battery bank instead of guessing.
Build the System, Not the Shopping List
The same principle that makes a properly planned PC build last longer than a component-by-component impulse purchase applies to a home energy setup. Understanding what you actually need before buying anything, sizing the system to your real load rather than to a neighbor’s result, and choosing components with future upgrade paths built in are the decisions that determine whether this is a sound investment or an expensive experiment that underperforms for the next decade.
The calculator is free. The foundation thinking costs nothing. Run your numbers, build your plan, and then buy the minimum that delivers what you actually need.